Welcome to the wonderful world of homemade yogurt, where tradition meets innovation in your very own kitchen! While scouring the internet for yogurt recipes, I noticed a common theme: most guides suggest using an Instant Pot or a crock pot to whip up a large batch, and then storing it in containers post-incubation. This method is efficient, but I always wondered – could we enhance the longevity and freshness of our yogurt by keeping it sealed throughout more of the process?
This curiosity isn’t unfounded. During my summer breaks in college, I had the unique opportunity to work at Dannon Yogurt. Although I wasn’t directly involved in the yogurt-making magic, I gained insights into their process. It was fascinating to learn that once the milk is inoculated, it remains in the same container – the very one you later pick up from the grocery store shelf. This got me thinking: why not replicate this efficient, sealed process at home?
Armed with this inspiration and a dash of creativity, I embarked on a quest to craft the perfect homemade yogurt, paying homage to the commercial process while adding my personal touch. Join me as we explore this delightful endeavor, combining the best of both worlds in our kitchens!
The Yogurt Process
Yogurt is nothing more than milk which has been mixed with beneficial bacteria that convert the milk into what we call yogurt. This conversion process happens best at 110-115*F and takes between 6-12 hours.
Because we want our beneficial bacteria to have an unfair advantage over other bacteria, the first step in the process is to kill all the bad guys – a process called pasteurization. The rest of the process is nothing more than precise control of temperature and waiting for the bacteria to do its job – called the incubation period.
Let’s talk about the equipment we will need to make this happen.
Equipment
Pasteurization – Sauce pot – something that can hold 1/2 gallon of liquid
Incubation – Sous Vide machine and container large enough to hold 12 Weck 762 jars (or whatever you are using)
Storage – Qty 12 – Weck 762 Jelly jars (or some other canning type jar that holds about 4-5 oz
Other Stuff you will probably need includes
- Ladel – for transferring the milk mixture to the jars
- pint glass – for mixing the yogurt culture with some of the milk mixture
- a fork for mixing the culture and milk
Why Weck 762 Jars
Weck jars are used for everything from canning your favorite food to crafts. In this use case, we are just looking for something that can be sterilized as well as remain hermetically sealed. The Weck 762 also looks the part for a yogurt container, so that’s a fancy bonus!
BUT! Before we get too far, let me make it clear that we are not “canning” yogurt. This recipe is not shelf stable, and the finished product, just like its commercial counterparts does require refrigeration.
Why Sous Vide
At its core, making yogurt is an exercise in meticulous control. It’s about fostering the right environment for beneficial bacteria and maintaining exact temperatures throughout the process. This is where the sous vide machine shines, offering unparalleled precision in controlling the temperature of a water bath, making it an ideal tool for yogurt making.
Consider how large-scale yogurt production works: the process involves controlling incubation temperatures within a vast tunnel. Here, entire pallets of yogurt, already snug in their plastic containers and boxed up, embark on a slow conveyor belt journey. This journey, spanning several hours, ensures that temperatures are consistently maintained, a critical factor in achieving the perfect yogurt consistency.
While we may not have the luxury of constructing an elaborate conveyor tunnel or boxing our jars, the sous vide method offers a beautifully simple yet effective alternative. Its warm water bath provides a consistently controlled environment akin to the commercial process but scaled down for home use. This makes sous vide the go-to choice for anyone serious about crafting exceptional homemade yogurt.
Let’s make some Yogurt
Step 1: Sterilize Your Weck Jars


First things first, cleanliness is key! Place your Weck jars and lids in a 250°F oven for about 30 minutes. To ensure they’re germ-free, leave them inside the closed oven after turning it off. Simultaneously, simmer the rubber seals in a saucepan of water, then cover and turn off the heat. This step is crucial for ensuring a safe, contamination-free yogurt-making process.
Step 2: Pasteurize the Milk

Now, heat ½ gallon of whole milk to 180°F. This step is vital for pasteurizing the milk, eliminating unwanted bacteria, and changing the protein structure for a thicker yogurt. Remember to use an instant-read thermometer frequently and stir the milk to prevent scorching. Achieving this temperature is a balancing act – it’s high enough for pasteurization but low enough to retain the milk’s natural goodness.
Step 3: Cool the Milk
After heating, cover the milk and refrigerate it until it cools to about 105-110°F. This temperature is ideal for the yogurt cultures to thrive without being destroyed.
I have a True beverage cooler which constantly circulates cold air. It took about an hour in the cooler to drop the temperature down to where it needed to be. A refrigerator will probably take a bit longer. I’ve also read not to use an ice bath to speed the process up as it would not cool evenly and could affect the texture.
Step 4: Prepare the Sous Vide Bath

While the milk cools, set up your sous vide container. Fill it with water and set the temperature to 112°F. The sous vide method allows for precise temperature control, ensuring consistent yogurt every time.
Step 5: Inoculate the Milk

Once the milk is cool, mix 4 tablespoons of yogurt culture (I used Dannon Greek yogurt I saved from the last quart I purchased.) with 1 cup of the sterilized milk in a pint glass. Stir until smooth, then combine it back into the pan of milk. This step introduces the beneficial bacteria necessary for turning milk into yogurt.
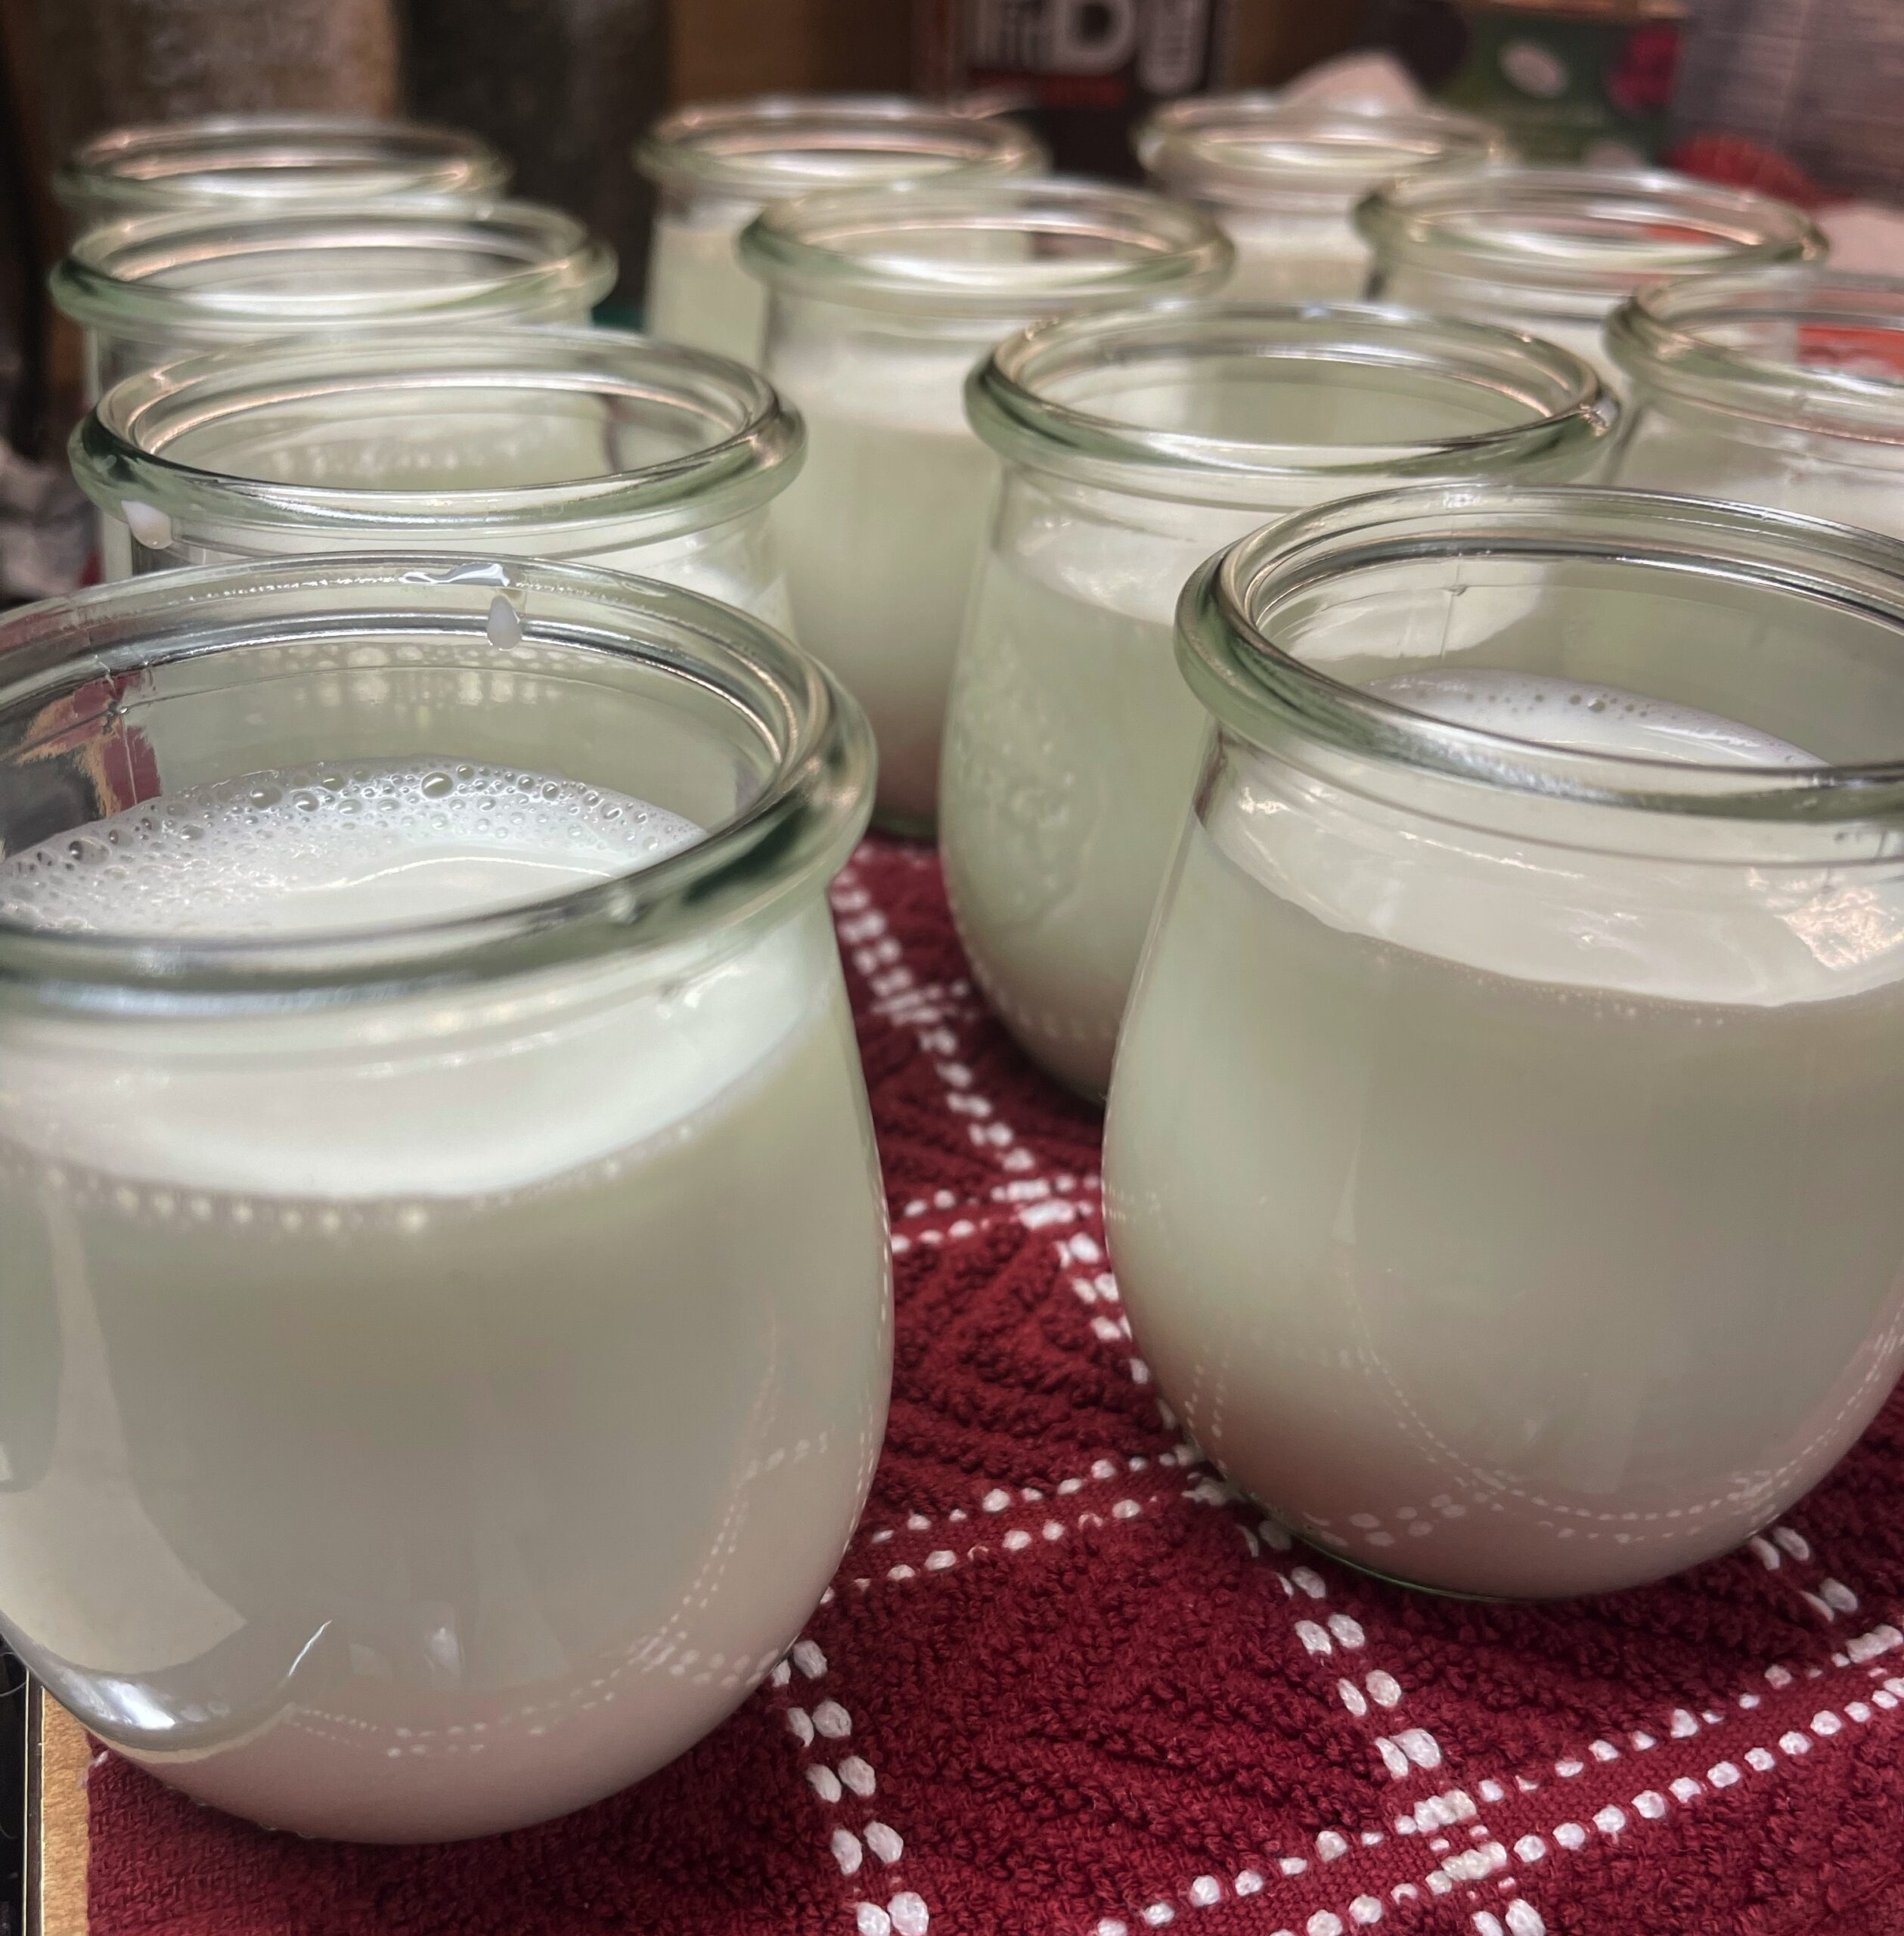
Step 6: Fill the Jars

Carefully remove the jars from the oven (they’re hot!) and place them on a towel. Using a ladle and funnel, fill the jars with your milk mixture, leaving some headspace. Pro tip: You can add fruit later for a delicious twist!
Step 7: Seal the Jars

Place the lids and rubber rings on the jars, securing them with metal clips. This creates a snug environment for the yogurt to set without external interference.
Step 8: Sous Vide Time

Gently place the jars into your sous vide container and start a 12-hour timer. The consistent temperature of the sous vide bath ensures a perfect setting environment for your yogurt.
Step 9: The Grand Finale

After 12 hours, remove the jars from the sous vide and refrigerate them. This cooling period is essential for the yogurt to fully set and develop its flavors. You may notice a little bit of whey on the top of your yogurt, this is completely normal. When you open the yogurt you get the choice of mixing the whey in, which will thin out the yogurt a little bit, or you can dump it out which will keep the yogurt a little thicker.
Step 10. Enjoy!
Finally, time to dig in! It’s also a great time to add some vanilla or berries or whatever floats your boat.
Conclusion
Homemade yogurt making is more than just a recipe; it’s a fun experience. The sous vide method coupled with the versatility of Weck jars not only guarantees a delicious outcome but also adds a touch of ‘fancy’ to your kitchen adventures. This process is a perfect blend of science and culinary art, proving that with the right tools and a bit of patience, anyone can create delicious, healthy yogurt at home. So, go ahead, give it a try, and don’t forget to share your experiences and creations!